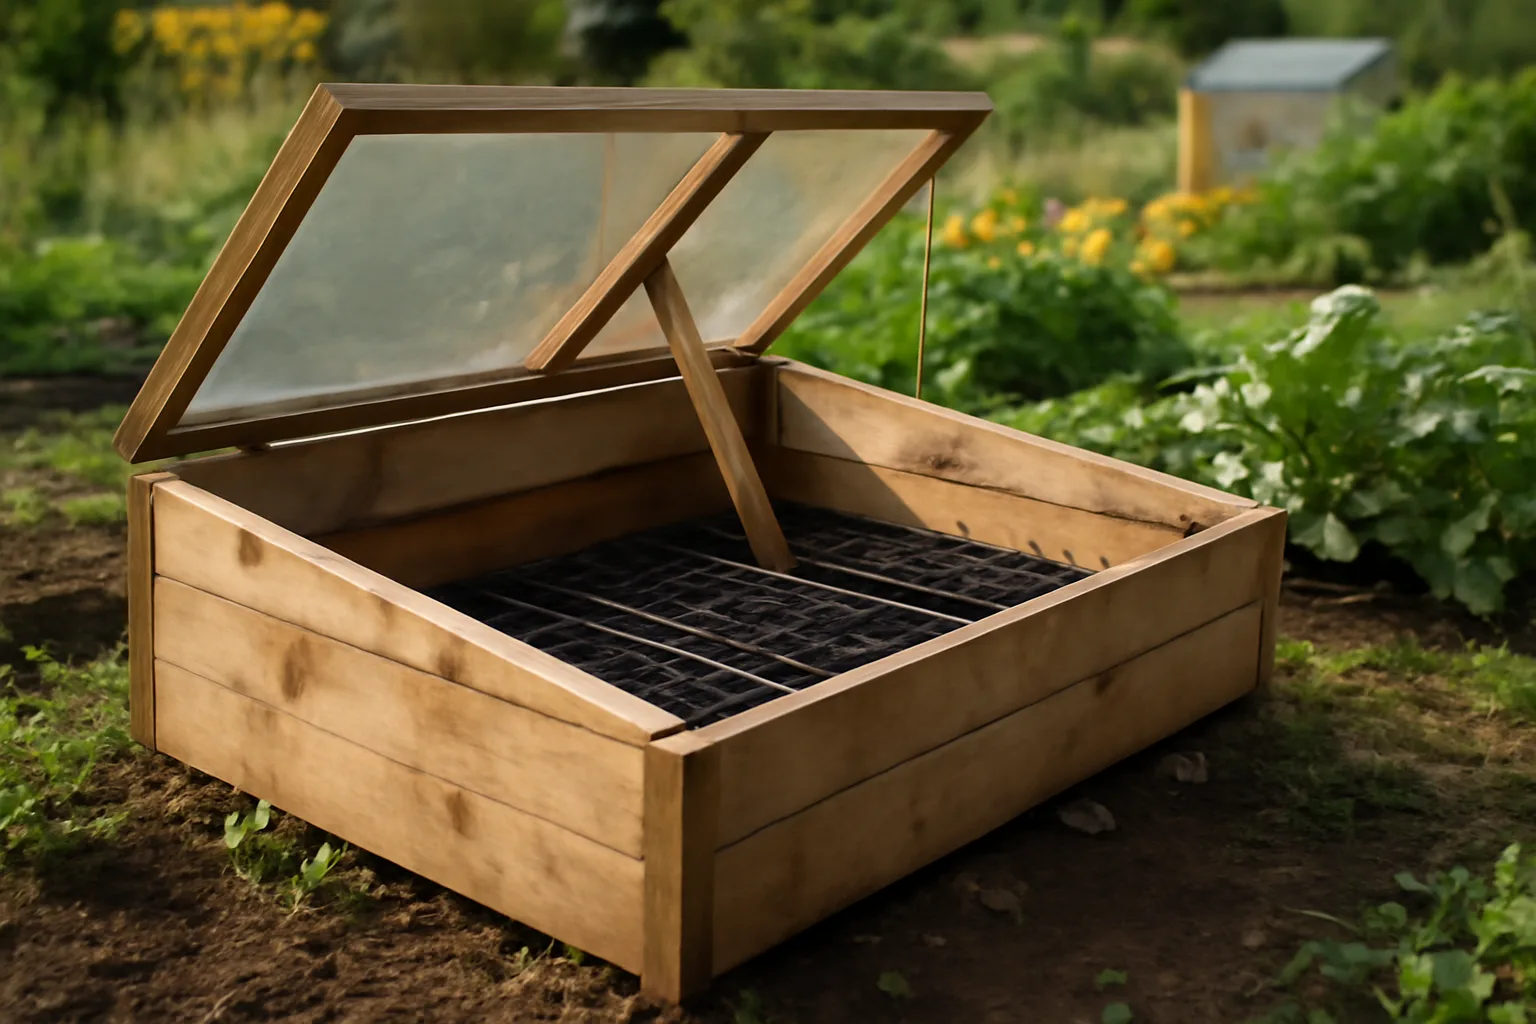
Building a cold frame from recycled materials is worth doing if you treat it like a small outdoor structure, not a flimsy seed-tray cover. The aim is simple: make a low, glazed box that traps useful warmth, sheds rain, opens easily and does not collapse the first time a March gust hits it.
In This Article
- Before You Build a Cold Frame from Recycled Materials
- Materials You Can Reuse, Buy Cheaply or Avoid
- Choose a Size and Shape That Actually Works
- Build the Base Without Making It Too Heavy
- Fit the Lid, Glazing and Ventilation
- Where to Put It and How to Use It Through the Year
- Common Cold Frame Build Mistakes
- Frequently Asked Questions
Before You Build a Cold Frame from Recycled Materials
A cold frame is not heated like a greenhouse. It works by catching daylight, blocking wind and holding a pocket of slightly warmer air around seedlings, cuttings or young plants. The RHS describes cold frames and mini-greenhouses as useful for hardening off plants, overwintering, sowing cool-condition seed and rooting cuttings, which is exactly the job this build should serve.
The useful target
For a UK garden, the sweet spot is usually a frame that is:
- Wide enough for standard seed trays: about 40cm deep trays need room to lift in and out.
- Low enough to hold warmth: huge air volume takes longer to warm and cools quickly overnight.
- Sloped enough to drain rain: a flat lid becomes a puddle, then a leak.
- Ventilated enough to prevent cooking plants: spring sunshine can turn a closed box from helpful to brutal.
- Strong enough to move once or twice: not every cold frame needs wheels, but it should survive being shifted by two people.
The best recycled cold frames I have used were not pretty. They were square, slightly overbuilt, easy to open with one hand and boringly reliable. That is a compliment.
What it will not do
Do not expect a recycled cold frame to replace a full greenhouse. It will not protect tomatoes through a hard winter, and it will not give you endless standing room for potting. Think of it as a staging post between the windowsill, greenhouse, shed or propagator and the open garden.
That distinction matters because it keeps the build sensible. You do not need £200 of new polycarbonate, automatic vents and joinery-grade timber. You need a tidy box, a clear lid and enough control to open it on mild days and shut it before cold nights.
Materials You Can Reuse, Buy Cheaply or Avoid
The cheapest cold frame is not the one made from whatever is lying behind the shed. It is the one made from salvage that is safe, weather-resistant and not a pain to cut. If a free material takes three hours to rescue and still leaks, it was not free.
Good recycled materials
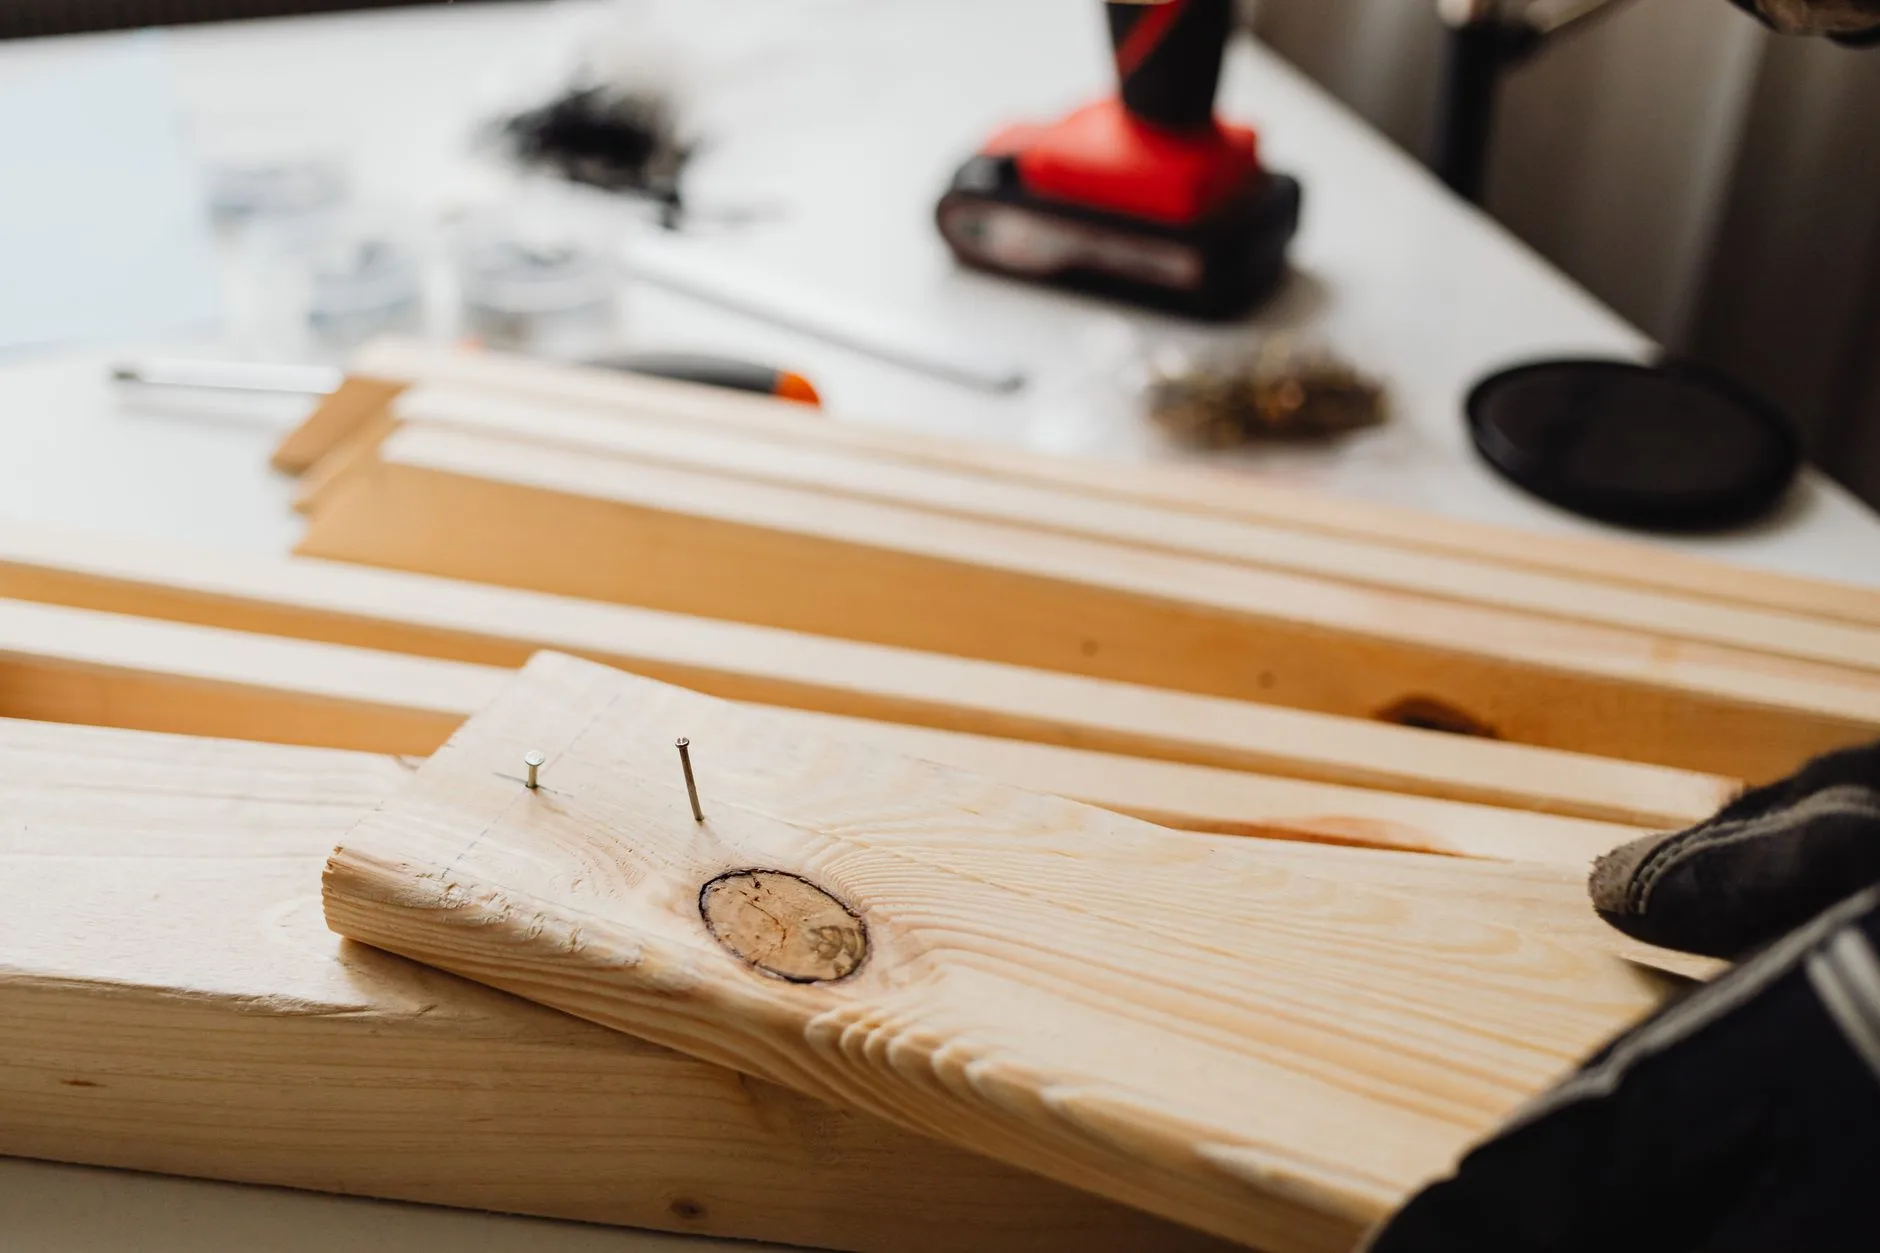
Old timber is the obvious starting point. Deck boards, pallet timber, fence rails, scaffold boards and leftover treated battens can all work if they are sound. Avoid pieces that are soft, split through the middle or black with rot at the ends. Press a screwdriver into suspect timber; if it sinks in easily, use that piece for firewood or disposal, not a cold frame.
Old windows, shower screens and secondary-glazing panels can make excellent lids, but glass changes the risk level. Toughened glass is much safer than thin old horticultural glass. If you cannot identify the glass and children use the garden, I would lean towards polycarbonate instead.
Clear corrugated PVC, twinwall polycarbonate offcuts and old greenhouse panels are easier to handle. A new 1220 x 610mm Corotherm 4mm twinwall sheet at Wickes was about £16 when checked in June 2026, while a larger Wickes 10mm twinwall 700 x 2500mm sheet was about £39. That gives you a useful ceiling: if your salvage plastic is cracked, yellow and brittle, buying one sheet may be the better-value move.
Cheap new parts worth buying
Even on a recycled build, I would usually buy fixings new. Old screws shear, rust and chew up heads at the worst moment.
Useful new parts and typical UK prices:
- Outdoor screws: Screwfix Turbo Outdoor 5 x 70mm screws were about £7.99 for 100; 5 x 80mm were about £8.99.
- Small hinges: basic galvanised or zinc-plated tee hinges are usually £4-£10 a pair from Screwfix, Toolstation or B&Q.
- Mending plates or corner braces: about £3-£8 for a small pack, useful if recycled timber is a bit uneven.
- Clear silicone or glazing tape: usually £5-£10, enough to stop rattles and wind-driven rain.
- Basic handle: about £3-£8, and far nicer than trying to pinch the lid edge with cold fingers.
For timber, B&Q listed rough sawn treated whitewood sticks around £3.47-£5.67 for common 1.8m sizes, and 2.4m treated timber around £4.47 in June 2026. That is useful if you only need one clean rail to complete a recycled frame.
Materials I would avoid
Some salvage causes more trouble than it saves. Painted timber from unknown sources can hide rot or old coatings. MDF and chipboard swell outside. Very heavy doors make dangerous lids unless the hinges and prop are excellent. Flexible plastic packaging looks clever for about five minutes, then tears.
Be careful with treated timber disposal too. The HSE’s wood recycling guidance is a useful reminder that waste wood can contain contaminants and needs proper handling rather than casual disposal. If you cut up old decking, fence panels or treated rails, keep waste pieces separate and check your local recycling centre rules rather than stuffing them in the green bin.
Choose a Size and Shape That Actually Works
The right size is the one you will use. A giant cold frame that blocks a path will become another thing to step round. A tiny one that fits two seed trays will annoy you every March.
A practical UK garden size
For most gardens and allotments, aim for about 100-120cm wide, 60-75cm deep and 25-40cm high. That usually holds several seed trays, fits against a sunny wall or raised bed, and can be moved by two adults if needed.
If you already have the lid, design around it. This is the recycled-build trick that saves the most cutting. Measure the window, polycarbonate sheet or old shower-screen panel first, then build the base 5-10mm smaller on each side so the lid overlaps slightly and sheds rain.
If you are buying new polycarbonate, choose the sheet before cutting timber. A £16 small twinwall sheet may suit a compact herb and seedling frame. A £39 larger sheet can cover a more useful allotment frame, but it may need a central support rail so it does not flex.
Slope matters more than looks
The back should be higher than the front. A simple slope from about 40cm at the back to 25cm at the front is enough for rain run-off and better light. Face the lower front towards the sun so the lid presents a broad glazed surface.
Do not overdo the height. A deep box feels substantial, but extra air volume makes it less responsive. For seed trays and small pots, shallow is better. For overwintering slightly taller plants, add height only at the back and keep the lid easy to open.
Plan access before cutting
Put a full seed tray in the marked-out space before you build. Can you lift it out without tipping compost into the frame? Can you reach the back row without kneeling on wet soil? Can the lid open far enough without hitting a wall, fence or greenhouse?
That dry run takes two minutes and prevents the classic cold-frame mistake: a lovely-looking box that is irritating every time you water it.
Build the Base Without Making It Too Heavy
Use the straightest timber for the front and back rails. Save uglier boards for the sides, where minor bends matter less. If you have only warped material, cut it shorter; a bent 2.4m board is often usable once split into 60cm side pieces.
Basic build sequence
Work on a flat surface if you can. A patio, garage floor or sheet of OSB over the lawn is better than building directly on uneven soil.
- Cut the front board to width.
- Cut the back board to the same width.
- Cut two side boards with the slope marked from back height to front height.
- Screw the four sides into a box, checking the diagonals so it is roughly square.
- Add corner blocks or braces inside each corner.
- Fit a central support rail if the lid is wide, flexible or made from thin plastic.
- Sand or plane any splintered edges you will handle regularly.
For most recycled timber, drill pilot holes. It sounds fussy, but old dry wood splits easily. A 3mm pilot for a 5mm screw is usually enough, and it makes the frame tighter.
Keep ground contact sensible
Pressure-treated timber tolerates damp better than untreated softwood, but no timber loves sitting in wet mud. If the base will sit on soil, place it on bricks, pavers or short treated bearers. That lifts the timber slightly and stops the bottom edge staying permanently wet.
I like a simple removable base rather than a fully floored box. Leave the bottom open so the cold frame can sit over soil, gravel or a raised bed. If you want it on a patio, put trays or capillary matting inside rather than adding a timber floor that will trap water.
Make it repairable
Do not glue every joint. Outdoor wood moves, and recycled materials vary. Screws and brackets let you replace one rotten front board later without dismantling the whole thing. That is the quiet advantage of a homemade cold frame: it can be ugly and still be serviceable.
If you have leftover exterior wood preservative, use it only where appropriate for the timber and plants. Avoid treating interior surfaces with strong-smelling products immediately before putting edible seedlings inside. Let treated parts dry and air properly before use.
Fit the Lid, Glazing and Ventilation
The lid is the part that decides whether the cold frame feels solid or annoying. It needs to let light through, stay attached, open easily and not slam shut in wind.
Reused window or glass lid
If you are using an old window, inspect the frame first. Rotten corners around the glass are a warning sign. Tighten loose screws, replace missing putty if needed, and fit two or three hinges rather than trusting one tired hinge in the middle.
Glass is heavy. Use a prop, chain or stay so the lid cannot fall while your hands are inside. A £6-£12 cabin hook or adjustable window stay is cheap insurance. If the glass is large, add a handle at the front and consider a second person for opening until you know how it behaves.
Polycarbonate or clear plastic lid
Twinwall polycarbonate is more forgiving. It is light, cuts with a fine-tooth saw or suitable blade, and does not shatter like glass. The trade-off is flex. A wide sheet needs timber support across the middle, and the edges need washers or fixings that do not tear through the plastic.
Corrugated PVC is cheaper but more awkward to seal. Use proper roofing fixings or washers, and avoid over-tightening. If the sheet buckles, water will find the low point.
For either plastic option, leave a little expansion room around fixings. Outdoor plastic moves with temperature. Pinning it brutally tight is how cracks start.
Ventilation you will actually use
The RHS hardening-off guidance says plants can be placed in a cold frame with the lid opened during the day as part of gradually acclimatising them outdoors. That is the key habit. A cold frame is not a sealed storage box.
At minimum, fit a prop that gives two opening positions: a small crack for mild days and a wider opening for sunny spells. A scrap batten with two notches works. So does an old greenhouse vent arm. Automatic openers are nice, but they cost around £20-£35 and are not necessary on a budget recycled build.
If you are away all day in spring, err on the side of more airflow. Seedlings recover better from being slightly cool than from being cooked in a closed clear box.
Where to Put It and How to Use It Through the Year
Put the cold frame where you will see it. Hidden behind the shed is where seedlings go to be forgotten. A sheltered south-facing or south-east-facing spot is usually best, especially against a wall, fence or raised bed that cuts wind.
Best positions
Look for:
- Good winter and spring light: avoid deep shade from fences, sheds or evergreen shrubs.
- Shelter from prevailing wind: warmth disappears fast if wind whistles through every gap.
- Easy water access: carrying a full can across the garden gets old quickly.
- Level ground: twist in the base makes lids harder to close.
- Drainage underneath: standing water cools the frame and rots timber.
If you already use raised beds, a cold frame built to sit over one end can be excellent. It gives you early salad leaves, protected seedlings and a neat place for hardening off. Link it to the rest of your setup rather than treating it as a separate gadget; if you are still planning beds, our guide to raised beds for beginners is a useful starting point.
Seasonal uses
In late winter, use the frame for hardy salad leaves, early brassicas and cool-season seed trays. In spring, it earns its keep for hardening off indoor-raised plants before they face wind and night temperatures. In autumn, it can stretch salad crops and protect late sowings from heavy rain.
It is less useful in high summer unless you ventilate heavily or remove the lid. A closed cold frame in July can overheat fast, especially on a patio. Use it for drying onions, protecting young plants from a rough night, or move it into lighter shade.
If you grow from seed often, pair it with the basics from seed starting equipment rather than buying every propagation accessory at once. A cold frame plus decent trays, labels and compost beats a cupboard full of gadgets.
What to grow first
Start with forgiving crops: lettuce, spinach, spring onions, parsley, hardy annuals and brassicas. Tomatoes, courgettes and beans can use the cold frame during hardening off, but they still need warmth and sensible timing before planting outside.
For an allotment or veg patch, a cold frame works nicely beside succession planting. Sow a small batch, move trays through the frame, plant out, then repeat. The frame becomes a rhythm, not a one-off spring project.
Common Cold Frame Build Mistakes
Most cold-frame failures are boring. The lid is too heavy, the timber rots, the frame is too big to move, or the plants get fried because nobody opened it.
Making the lid dangerous
A heavy glass lid without a stay is the big one. If you use glass, build the lid support before you put plants inside. A scrap stick is better than nothing, but a fixed stay or chain is safer. Do not let children use a heavy glass frame unsupervised.
Building it too deep
Depth feels useful until you realise the front row shades the back or the air takes ages to warm. For seed trays, keep it shallow. If you need height for larger pots, build one taller frame later rather than making your first cold frame oversized.
Sealing it like a fish tank
Plants need air movement. A few small gaps are not the enemy; uncontrolled draughts and leaks are. Aim for a lid that closes neatly but can be propped easily. If condensation is dripping every morning and compost stays wet, you need more ventilation.
Ignoring slugs and mice
A cold frame is a lovely sheltered buffet. Check under trays, avoid leaving old leaves inside, and lift pots occasionally. Copper tape costs around £5-£10 a roll, but it is not magic. Keeping the frame clean and raising trays slightly often does more.
Forgetting the rest of the garden system
A cold frame is only one part of growing. It will not fix poor compost, bad watering or planting too early. Use it alongside sensible basics: good compost, realistic crop timing, simple garden fleece and cloches when extra frost protection is needed, and proper spacing once plants move out.
My favourite budget build would be a treated-timber base from reclaimed boards, one new £16-£39 polycarbonate sheet if no safe lid is available, new outdoor screws, two hinges and a notched timber prop. That usually lands around £30-£70 if you already have some timber, or £80-£120 if most parts are bought new. Still cheaper than many ready-made wooden cold frames, and easier to repair when a corner finally gives up. If you are still building out the basics, keep the tool list lean; our beginner tools and equipment guide covers the few hand tools that earn storage space.
Frequently Asked Questions
Can I build a cold frame from pallets? Yes, if the pallet timber is sound, untreated or safely treated, and not split. Pallet boards are thin, so use corner blocks and pilot holes to stop them cracking.
Is glass or polycarbonate better for a recycled cold frame? Polycarbonate is safer and lighter for most home builds. Glass can work well, but it needs strong hinges, a proper lid stay and extra care around children.
How much does a DIY cold frame cost in the UK? A recycled build can cost £30-£70 if you reuse timber and buy only fixings and glazing. If you buy most materials new, expect roughly £80-£120.
Should a cold frame have a bottom? Usually no. An open bottom lets the frame sit over soil, gravel, trays or a raised bed. A timber floor traps damp and is often the first part to rot.
Where should I put a cold frame? Choose a bright, sheltered spot with decent drainage, ideally facing south or south-east. Keep it somewhere visible so you remember to open, close and water it.
Do I need to open a cold frame every day? In mild or sunny weather, yes. Open it during the day to prevent overheating and close it before cold nights, especially when hardening off seedlings.